


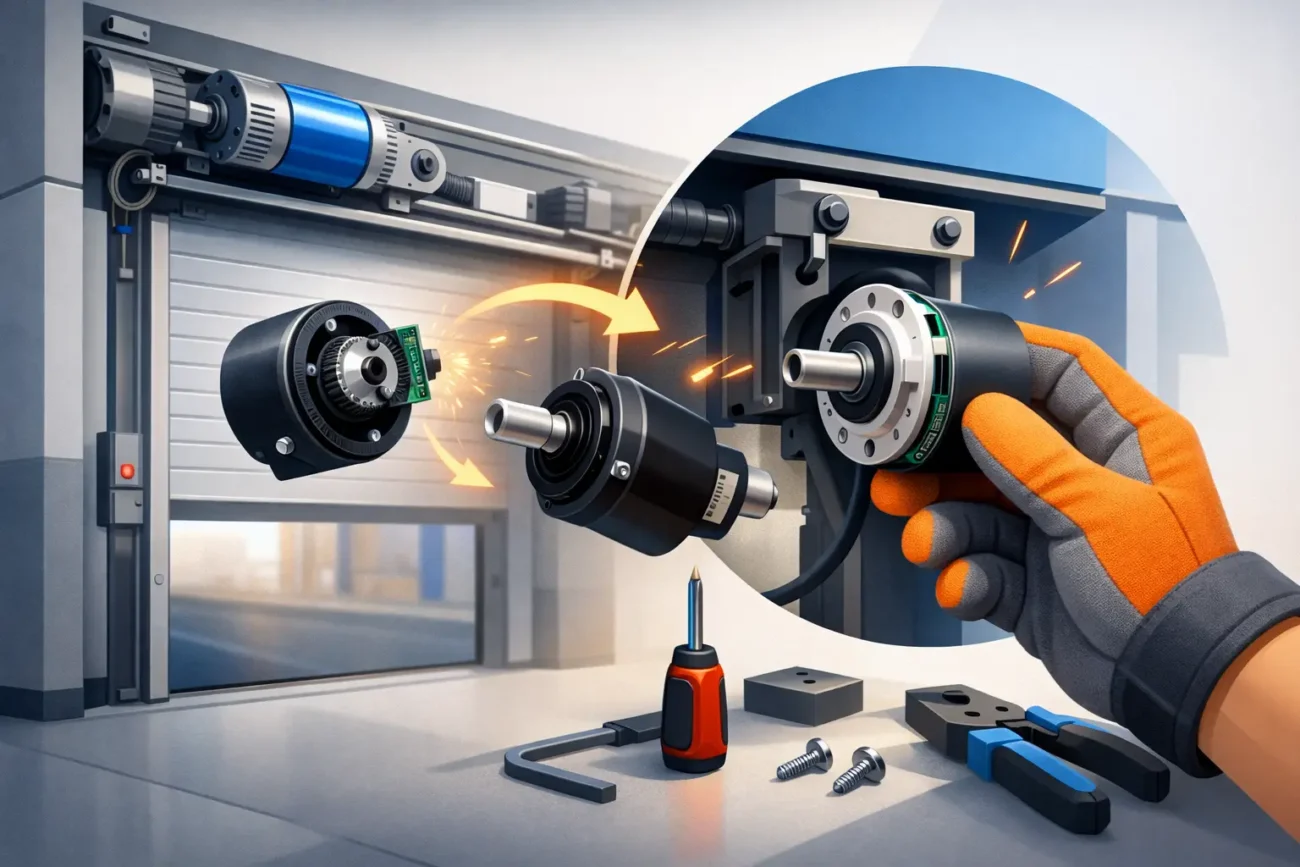
A fast door that starts hunting for position, stopping short, or refusing to complete a cycle usually points to one small component causing a very big problem. If you need to replace industrial door encoder parts, speed matters, but accuracy matters more. Fit the wrong unit, miss a setup step, or ignore the root cause, and you can end up back on site with the same fault still there.
When an encoder is actually the problem
Encoders sit at the heart of door position control. They tell the control system where the door is, how fast it is moving, and whether it is behaving as expected. On high-speed doors, sectional industrial doors, roller shutters and other automated systems, that feedback is what keeps travel accurate and safe.
When an encoder starts to fail, the symptoms are not always neat and obvious. You might see inconsistent stopping points, partial opening, reversing without a clear obstruction, erratic slow-down, or fault codes linked to motor feedback or positioning. Some doors will continue to run badly for a while. Others will lock out altogether.
That said, it is not always the encoder itself. Wiring damage, water ingress, loose couplings, motor issues, brake faults, control board problems and setup errors can all mimic encoder failure. Before you order a replacement, it is worth checking the basics properly.
Checks to make before you replace industrial door encoder parts
Start with the simple faults first. Inspect the encoder body, connector and cable for physical damage, trapped sections, abrasion or moisture. A door in a busy loading bay or washdown environment often suffers cable and connector problems long before the encoder internals fail.
Next, check whether the encoder mounting is secure. A loose fixing or worn coupling can cause intermittent feedback because the encoder shaft is no longer tracking motor rotation correctly. You may also find contamination around the motor assembly, especially on doors operating in dusty or cold-store conditions.
Then review the control panel faults and setup values. Some systems throw encoder-related alarms when the travel limits are corrupted or after a power issue. If the stored parameters have shifted, the hardware may still be sound. On certain makes, a reset and full relearn procedure solves the problem. On others, that same symptom points to a failed feedback device. It depends on the brand, control logic and age of the operator.
If you have test equipment and manufacturer data, check the supply voltage and signal output at the encoder. If not, the safest route is to identify the exact part from the motor, operator or door data and replace like for like.
Getting the right encoder first time
This is where many repairs go wrong. Industrial door encoders are not interchangeable just because they look similar. Shaft size, connector type, pulse count, voltage, output format, mounting arrangement and environmental rating all need to match the application.
A direct replacement is usually the safest route, particularly on branded operators from manufacturers such as Hörmann, Dynaco, Crawford and other industrial door systems. Some encoders are supplied as dedicated OEM parts. Others may be cross-referenced, but only if the technical specification truly matches.
You will usually need one or more of the following: the door model, motor plate details, control board type, existing encoder part number, and clear photos of the unit and connector. If the label is worn or missing, a photo-led identification process is often the quickest way forward. That is exactly the sort of job where practical parts support saves time.
How to replace industrial door encoder safely
Before any work starts, isolate the power properly and secure the door against unexpected movement. Industrial doors can store energy through springs, counterbalance systems and drive assemblies, so this is not a job to rush. If the door has a known mechanical defect, address that before fitting new electrical parts.
Remove covers carefully and document the existing setup. A few photos before disassembly can save a lot of guesswork later, especially around cable routing and connector orientation. If the encoder is mounted on the motor or gearbox, check access around nearby components so you do not strain wires or damage seals while removing it.
Disconnect the encoder plug and release the mounting hardware. If the unit is shaft-mounted, avoid forcing it off. Corrosion or overtightened fixings can make removal awkward, and excessive force can damage the motor shaft or mounting face. A clean, controlled removal is always better than turning a parts swap into a larger repair.
Before fitting the new encoder, compare it side by side with the old one. Check the connector, shaft length, fixing pattern and label details. Even one small mismatch can lead to incorrect readings or immediate faults.
Fit the replacement squarely and securely, but do not overtighten. Reconnect wiring exactly as intended, keeping cables clear of moving parts and pinch points. If seals or glands are part of the assembly, make sure they are reinstated correctly. Poor cable sealing is a common reason repeat failures happen.
Commissioning after encoder replacement
Replacing the hardware is only half the job. Many systems require a reset, learning cycle or travel setup after an encoder change. If the controller uses encoder feedback for position memory, the old settings may no longer line up with the new component.
Follow the door manufacturer’s procedure for commissioning. That may involve relearning open and closed positions, confirming direction of travel, setting slowdown zones or clearing historical fault codes. Skip this stage and the door can behave unpredictably even with a brand new encoder fitted.
Watch the first full cycles closely. The door should travel smoothly, stop where expected and respond correctly to safety inputs. If it overshoots, hesitates or reverses, stop and recheck the setup before putting it back into service.
Why encoders fail in the first place
A failed encoder is often a symptom of site conditions rather than just age. Doors on high-use sites see vibration, impact, dust, condensation and temperature swings every day. On external shutters and loading bay doors, water ingress is a regular culprit. In food, cold-chain and washdown environments, cleaning chemicals and moisture can shorten component life as well.
Mechanical strain also plays a part. If the door is heavy to move, badly balanced, or fighting worn bearings and guides, the operator works harder and associated components suffer. In that case, replacing the encoder without addressing the drag or imbalance may only buy you a short period of improvement.
That is why good fault finding matters. A new part should fix the problem, not just mask it for a fortnight.
Repair, replace, or call for help?
If you are a trained engineer with the correct isolation procedure, product data and access to the right part, encoder replacement is usually a straightforward service job. If you are dealing with an unfamiliar operator, missing labels or repeated feedback faults, there is a strong case for slowing down and confirming the diagnosis before ordering.
For facilities teams and end users, the sensible move is often to gather photos and door details first rather than guessing. The cost of a wrong part is not just the component. It is the lost time, second site visit, delayed goods movement and avoidable downtime.
This is where specialist sourcing support earns its keep. Door Spares UK works with engineers, sites and property owners who need exact-fit components without the usual back and forth. If the part number is clear, great. If not, photos and operator details can often get you to the right encoder much faster than trying to match it by appearance alone.
A few mistakes worth avoiding
The most common mistake is treating all encoder faults as identical. One door may need a like-for-like swap. Another may need wiring repair, a control board check or a full limit relearn. The second mistake is ordering on appearance only. Similar housings can hide completely different specifications.
The third is forgetting the environment. If the original failed because of water ingress or cable damage, fitment alone will not solve the issue. You may need to improve sealing, reroute the cable, replace damaged glands or address exposure around the operator.
And finally, do not ignore safety behaviour after the repair. If the door is striking limits, failing to slow correctly or behaving erratically, take it out of service until the setup is confirmed. A running door is not the same as a safe door.
When you need to replace an industrial door encoder, the fastest route is not guessing. It is identifying the exact part, fitting it properly, and making sure the rest of the system is not setting the new component up to fail.



Leave a comment